If you’re experiencing problems with your air conditioning system, here are some common issues and troubleshooting tips to help fix the problem:
1. No cool air is coming out of the vents: Check the thermostat settings, make sure the air filter is clean, and inspect the outdoor unit to see if it’s blocked or dirty.
2. The air conditioner won’t turn on: Check the thermostat to ensure it’s operational, check the circuit breaker, and look for any signs of damage to the electrical system.
3. The unit is leaking water: Check the condensate line for clogs or leaks, examine the drain pan for cracks, and inspect the air filter to see if it’s dirty.
4. The air conditioner is making strange noises: Check the fan blades for damage or looseness, examine the motor and blower assembly, and listen for any unusual sounds coming from the compressor.
Remember to always turn off the power to your air conditioner before attempting any repairs or maintenance. If you’re unsure about troubleshooting your air conditioning system, it’s best to call a professional to avoid further damage and ensure proper repairs.
Air Conditioning Unit Will Not Turn On
When your air conditioning units will not turn on, it can be a cause of concern. There are several possible causes that could be preventing your unit from turning on.
In this article, we will discuss the common reasons that may cause your AC unit to fail to turn on, as well as the ways to troubleshoot and fix the issue.
Check Thermostat Settings
If your air conditioning unit will not turn on, the first step in troubleshooting the problem is to check the thermostat settings. Here’s how:
Check that the thermostat is set to “cool” rather than “heat” or “off.”
Ensure that the temperature setting is lower than the current room temperature.
Make sure that the thermostat batteries are not dead or drained.
Confirm that the circuit breaker for the air conditioning unit has not tripped or switched off because of an electrical fault.
If these steps fail to solve the problem, it may be time to call a professional HVAC technician to diagnose and repair the issue, which could include problems such as a faulty compressor or motor, low refrigerant levels or leaks, or electrical wiring issues.
Pro Tip: Regular maintenance and cleaning of the air conditioner unit can help prevent many common problems.
Check Circuit Breakers and Fuse Box
If your air conditioning unit is not turning on, it may be due to a tripped circuit breaker or a blown fuse in your electrical panel. Checking your circuit breaker and fuse box is a crucial step in troubleshooting common air conditioning problems.
Here’s how to do it:
Locate your home’s electrical panel or fuse box. It is usually located in a basement, garage, or closet.
Check if any circuit breakers have tripped or if any fuses have blown. A tripped circuit breaker will be in the “off” position, while a blown fuse will have a broken filament.
If you find a tripped circuit breaker, reset it by flipping it all the way to the off position, then back to the on position. If you find a blown fuse, replace it with a new one of the same amperage.
If your circuit breaker and fuse box are in good working condition and your air conditioning unit still won’t turn on, it may be time to call a professional HVAC technician for further diagnosis and repair.
Check Air Filter
Checking the air filter is one of the essential steps in troubleshooting air conditioning unit problems, especially if your AC unit won’t turn on. Dirty air filters are one of the most common culprits of AC malfunction, as they restrict proper airflow, cause overheating, and damage to the compressor.
Here is how to check the air filter in your AC unit:
Turn off the unit’s power supply.
Locate the air filter compartment on your AC unit.
Remove the air filter.
Hold the filter up to the light, and If you can’t see light pass through it, the filter needs cleaning or replacement.
If the filter is dirty or clogged, clean or replace it with a new one.
Reinsert the clean filter and turn on the unit. If it still won’t turn on, you may have a more significant issue that requires a professional technician.
Pro Tip: To maximize your AC unit’s efficiency, clean or replace your filters every 4-6 weeks.
Air Conditioning Unit Is Not Cooling Properly
Does your air conditioning unit not seem to be cooling properly? This is a common issue and can be caused by a few different problems.
In this blog, we will cover the most common causes of air conditioning units not cooling properly, and how you can troubleshoot the issue. We’ll also provide tips to prevent further damage to your air conditioning unit.
Check Thermostat Settings
If your air conditioning unit is not cooling properly, the first thing to check is the thermostat settings.
Here are the steps to follow:
Check the thermostat mode: Make sure it is set to cool and not to heat, fan, or off.
Check the temperature settings: Make sure the thermostat is set to a temperature lower than the current room temperature.
Replace batteries: If your thermostat uses batteries, replace them with fresh ones.
Unit location: Ensure that there are no heat-emitting devices or direct sunlight on the thermostat.
If none of these steps solves the issue, you may need to call in a professional to diagnose and repair any issues with your AC unit. Pro tip: Regular maintenance of your AC unit, including replacing filters and cleaning coils, can prevent common cooling problems from occurring.
Check Air Filter
Checking the air filter is a crucial step when troubleshooting common air conditioning problems such as the unit not cooling properly. A dirty or clogged air filter can cause the AC unit to work harder, increase energy consumption and result in poor cooling performance.
Here’s what you can do to check and clean your AC unit air filter:
Turn off the AC unit and locate the air filter behind the return air grille or in the air handler unit.
Remove the air filter and inspect it for dirt or debris on the surface.
Hold the filter up to a light source and check if the light can pass through the filter easily. If not, the filter is clogged and needs to be replaced or cleaned.
Clean the air filter with a soft brush or a vacuum cleaner. Alternatively, replace the filter with a new one of the same size and type.
Regularly checking and cleaning or replacing the air filter can help maintain efficient cooling and prevent costly AC repairs.
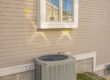
Inspect the Outdoor AC Unit
If your air conditioning unit is not cooling properly, one of the first steps to consider is inspecting the outdoor AC unit. Here are the steps you can follow to troubleshoot common air conditioning problems:
1) Turn off the power to the air conditioning unit.
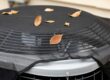
2) Remove any debris, such as leaves or twigs, from the top of the unit.
3) Remove the fan cage to access the fan blades.
4) Inspect the fan blades for any damage or wear and tear.
5) Clean the fan blades and the interior of the unit with a soft-bristled brush or a vacuum cleaner.
6) Check the fan motor by turning the fan blades by hand. If they do not spin freely, the motor may need to be oiled or replaced.
7) Inspect the fins of the condenser coil for any damage or obstruction.
8) Straighten any bent fins with a fin comb.
Pro tip: Regular maintenance of your air conditioning unit can prevent common problems and prolong the life of your equipment. Schedule annual maintenance with a professional HVAC technician to keep your unit running efficiently.
Air Conditioning Unit Is Leaking Water
If your air conditioning unit is leaking water, then it could be an indication of some underlying issues that need to be resolved. A leak indicates that the system is not working properly and the pressure is not being regulated correctly.
In this blog, we’ll take a look at some of the common causes of an air conditioning unit leaking water, as well as some easy-to-implement troubleshooting steps to help you resolve the problem.
Check the Condensate Drain Line
If your air conditioning unit is leaking water, the first thing you should do is check the condensate drain line. The condensate drain line is responsible for removing the moisture that your air conditioning unit removes from the air. When this line is clogged or damaged, it can cause water to back up into your unit and eventually leak out.
To check the condensate drain line, follow these simple steps:
- Locate the condensate drain line, which is typically a PVC pipe that runs from your unit to the outside of your home.
- Inspect the line for any visible signs of damage or clogs, such as algae or debris.
- Use a wet/dry vacuum to suction out any debris or water in the line.
- Pour a mixture of equal parts water and vinegar down the drain line to clear out any remaining debris.
- If you’re still experiencing issues with water leaking from your unit, it’s best to contact a professional air conditioning technician to diagnose and repair the problem.
Pro tip: Regular maintenance of your air conditioning unit, including cleaning the condensate drain line, can help prevent water leaks and costly repairs in the future.
Check the Air Filter
One of the most common causes of an air conditioning unit leaking water is a clogged or dirty air filter. When an air filter becomes dirty, airflow is restricted, causing the evaporator coil to freeze up, which leads to excess water production and ultimately causes leakage.
Here’s how you can check and replace your air filter:
Locate your air filter. It is usually found near the return air duct or handler.
Determine the size of your air filter by checking the dimensions printed on it or the air handler.
Turn off your air conditioning unit and remove the air filter.
Clean or replace the air filter, depending on its condition.
Reinstall the air filter and turn your air conditioner back on to check if the leakage has stopped.
Remember to replace your air filter every 1 to 3 months, depending on usage and the manufacturer’s recommendations.
Check for Ice on the Evaporator Coil
One common cause of an air conditioning unit leaking water is a frozen evaporator coil. Checking for ice buildup on the evaporator coil is an essential troubleshooting step for any homeowner who suspects their AC unit is leaking.
Here’s what you need to do:
- Turn off the air conditioning unit and let it thaw completely.
- Remove the air filter and check it for any signs of damage, such as holes or tears.
- Locate the evaporator coil, which is inside the air handler unit.
- Check for any visible signs of ice buildup on the coil, such as frost or ice crystals.
- If necessary, use a hairdryer on the lowest heat setting to melt the ice. Be sure to keep the hairdryer moving to prevent damage to the coil.
- Once the ice has melted, replace the air filter and turn the unit back on.
- If the unit continues to leak water, contact a professional HVAC technician as soon as possible to prevent further damage.
Pro Tip: Regular maintenance and cleaning of your AC unit can prevent common issues like a frozen evaporator coil. Be sure to schedule an annual maintenance check-up with a licensed technician to ensure your unit is running efficiently.
Air Conditioning Unit Is Making Unusual Noises
Is your air conditioning unit making strange and loud noises? Many air conditioning units create some noise while they are running, but if they start making unusual noises, such as grinding sounds or loud squeaks, you may have a problem.
Let’s get into the details on how to diagnose this issue and how to fix it.
Check for Loose Parts
If your air conditioning unit is making unusual noises, it is likely that some parts have come loose. A loose part can cause serious damage to your air conditioning system and can decrease its lifespan. Here’s what you can do:
Check the air filter: A dirty or clogged air filter can cause unusual noises to come from your AC unit. Check and replace the air filter if needed.
Check the outdoor unit: The outdoor unit of your AC system can also cause loose parts to vibrate and make noises. Check for any bent or damaged fins or debris that might be stuck in the unit.
Check for loose parts: Check for any loose bolts, nuts, or screws in your air conditioning unit. If you find any, tighten them carefully with proper tools.
Note that some noises can indicate more severe problems, so if you’re not comfortable troubleshooting or unsure what to do, call an HVAC professional for help.
Check the Blower Fan
If your air conditioning unit is making unusual noises, the blower fan may be to blame. The blower fan circulates the air throughout your AC system, and over time, it can become dirty or loose, resulting in strange noises.
Here’s how to troubleshoot the problem:
Turn off your AC unit and remove the filter to assess the condition of your blower fan.
Inspect the fan for any visible signs of damage or dirt buildup. If you notice any dirt or debris on the blades, use a soft brush or cloth to gently clean them.
Check the fan belt for any loosening, wearing or cracking, and replace it if needed.
If the blower fan appears to be in good condition, the problem may be caused by a faulty fan motor or loose fan blades, which are best left to a professional technician to fix.
Pro Tip: Regularly cleaning and maintaining your AC system can help prevent issues with the blower fan and other components.
Lubricate Moving Parts
Lubricating the moving parts is an essential step in troubleshooting common air conditioning problems, especially when the unit is making unusual noises. Lack of lubrication can cause friction, which can damage the motor and other components of the air conditioner.
Here’s how you can lubricate the moving parts of your air conditioner:
- Turn off the power to the air conditioner.
- Locate the motor and other moving parts.
- Apply a few drops of lubricant oil to the bearings and other moving parts of the air conditioner.
- Turn on the power and allow the air conditioner to run for a few minutes.
- Listen for any unusual noises. If the noise persists, it may be a sign of a more serious problem that requires professional maintenance.
Air Conditioning Unit Has Foul Odors
Experiencing a foul odour from your air conditioning unit can be quite unpleasant. This symptom can be caused by bacteria or mold growth in the condensate pan or drain pipe, which can result in a musty or mildewy smell.
In this blog post, we will explain what could be causing this odour and provide some tips on how to troubleshoot it.
Change the Air Filter
When your air conditioning unit has foul odors, changing the air filter is the first step in troubleshooting the problem. A dirty air filter can cause a range of issues, including poor air flow, decreased efficiency, and unpleasant smells.
Here’s how to change your air filter:
Turn off your AC unit.
Locate your air filter, which is typically found in the return air duct or blower compartment.
Remove the old filter and dispose of it properly.
Replace the filter with a new one of the same size and type, following the manufacturer’s instructions.
Turn your AC unit back on and check if the foul odor persists.
If the odor lingers, it may be an issue with your ductwork or other components of your AC unit. In this case, it’s best to call a professional HVAC technician.
Pro tip: Remember to regularly change your air filter – this simple task can help prevent a range of air conditioning problems and keep your unit running smoothly.
Check the Drain Pan and Drain Line
If you notice that your air conditioning unit has a foul odor, it may be a sign that the drain pan and drain line need to be checked and cleaned.
Here’s what you need to do to troubleshoot the problem:
1. Turn off your air conditioning unit and locate the drain pan.
2. Check the drain pan for any debris or standing water that may be causing the odor.
3. Clean the drain pan with a mixture of water and mild soap, and check for any clogs or blockages in the drain line.
4. Use a wet-dry vacuum to remove any remaining debris from the drain line.
5. Pour a solution of one cup of bleach and one gallon of water down the drain line to kill any bacteria or mold that may be causing the odor.
By performing these simple troubleshooting steps, you can eliminate foul odors and ensure that your air conditioning unit is functioning properly.
Pro tip: Regular maintenance of your air conditioning unit can prevent common problems like foul odors and prolong the life of the unit.
Clean the Evaporator Coil
Cleaning the evaporator coil is an efficient solution to eliminate the foul odor coming from your air conditioning unit.
The evaporator coil is located inside your AC unit and is responsible for cooling the air as it flows through the system. Over time, the coil can become dirty, leading to mold and mildew growth that produces a bad smell.
Here are the steps to follow to clean the evaporator coil of your AC unit:
Turn off the AC unit and disconnect the power supply.
Locate the evaporator coil inside the air handler and remove the access panel.
Use a soft brush or air compressor to remove dirt and debris from the coil.
Mix a solution of warm water and mild detergent and spray it on the coil.
Let the solution sit for a few minutes, then rinse the coil with warm water and dry it with a clean cloth.
Reinstall the access panel and turn on the AC unit to check if the odor has disappeared.
Regular maintenance of the evaporator coil can prevent further unpleasant smells from building up in your AC unit.
Air Conditioning Unit Is Frozen
If your air conditioning unit is frozen, it could be a sign that your system is malfunctioning. This is because the unit should be able to control the temperature and humidity in your home. If it’s not, it could be a sign that a number of components are malfunctioning.
This blog will cover the steps you should take to troubleshoot and diagnose common air conditioning problems that could lead to a frozen air conditioning unit.
Turn off the AC unit
If your air conditioning unit is frozen, it’s likely due to restricted airflow or low refrigerant levels. Turning off the AC unit is one step in troubleshooting the issue, but there are a few other steps to follow:
Check the air filter- Dirty air filters can cause restricted airflow. If the filter is dirty, try replacing it and see if the issue resolves.
Check for frozen coils- If the coils are frozen, turn off the unit and let them thaw for a few hours, then turn the unit back on.
Check the refrigerant levels- Low refrigerant levels can also cause frozen coils. If you suspect that’s the issue, contact a professional to handle the refrigerant refill.
Check the fan- If the fan isn’t functioning correctly, it can cause airflow issues. Check to ensure the fan is running smoothly.
If none of these steps resolve the issue, contact a professional to inspect your AC unit for any underlying problems.
Change the Air Filter
If your air conditioning unit is frozen, one of the most common causes is a dirty or clogged air filter. Changing the air filter can solve the problem and prevent future issues.
Here’s how you can change the air filter in your AC unit:
Locate the air filter in your AC unit. It’s usually found near the return air duct or blower compartment.
Turn off the power supply to your AC unit to avoid any electrical hazards.
Remove the old air filter and dispose of it properly.
Install the new filter in the same direction as the previous one, with the arrows on the filter pointing towards the blower motor.
Turn on the power supply to your AC unit and check if it’s functioning properly.
Changing your air filter every one to three months can greatly improve the efficiency and lifespan of your AC unit.
Pro tip: To avoid future problems, schedule regular maintenance of your AC unit with a professional HVAC technician at least once a year.
Check the Refrigerant Level
Low refrigerant levels can cause your air conditioning unit to freeze up. Here are the steps to check your unit’s refrigerant level:
Step 1: Turn off your air conditioning unit and let it defrost completely.
Step 2: Locate the access valve on the refrigerant line. This valve is usually located near the outdoor unit of your system.
Step 3: Attach a refrigerant gauge to the access valve. The gauge will provide a reading of your unit’s refrigerant level.
Step 4: Compare the gauge reading to the recommended refrigerant level listed on the unit’s manufacturer label. If the reading is below the recommended level, call a professional HVAC technician to add refrigerant to your system. It is important not to overfill the refrigerant, as this can cause additional damage to your system.
Regular maintenance and professional check-ups can help ensure that your air conditioning unit is functioning properly and avoid potential problems.
Air Conditioning Unit Is Blowing Warm Air
One of the most common problems with air conditioning units is when they start to blow out warm air instead of cold. If this happens, the first thing you should do is try to troubleshoot the problem on your own.
This blog post by Brisk Air Conditioning, LLC in Venice, Florida will discuss how to identify and fix the issue if your AC unit is blowing out warm air.
Check the Air Filter
If your air conditioning unit is blowing warm air, the first thing you should do is check your air filter. A clogged air filter can cause your AC unit to malfunction and blow warm air.
Here’s how you can check and replace your air filter:
Turn off the power to your air conditioning unit.
Locate the air filter panel on your AC unit.
Open the panel and remove the air filter.
Check the filter for debris and dust buildup. If the filter looks dirty, it needs to be replaced.
Insert a new filter and close the panel.
Turn on the power to your AC unit and test if it’s now blowing cool air.
Regularly replacing your air filter can improve the efficiency of your AC unit and prevent future malfunctions. A good rule of thumb is to replace your air filter every 1-3 months depending on usage.
Pro Tip: It’s important to use the right size and type of air filter recommended by your AC manufacturer for optimal performance.
Inspect the Ductwork
Inspecting the ductwork is an important step in troubleshooting your air conditioning unit if it is blowing warm air. Your ductwork is responsible for distributing cool air throughout your home, and it can become blocked or damaged over time, reducing its efficiency and effectiveness.
Here are the steps to follow in inspecting your ductwork:
Start by examining the visible ducts for signs of damage or wear, such as cracks, holes, or loose connections.
Check your air filter and replace it if it is dirty or clogged.
Move on to inspecting the ducts that are hidden behind walls or in the attic. Look for signs of blockage, such as visible debris, or listen for air hissing out of gaps or leaks.
Finally, if you suspect that there are issues with your ductwork that you cannot see or access, schedule an appointment with a professional HVAC technician.
By inspecting your ductwork regularly, you can ensure that your air conditioning unit is working at its best and keeping your home cool and comfortable all summer long.
Check for Refrigerant Leaks
If your air conditioning unit is blowing warm air, it might be due to a refrigerant leak. Here are the steps to check for a refrigerant leak in your AC:
1. Look for oil stains around your AC unit or refrigerant lines. Oil stains are a sign of a refrigerant leak.
2. Inspect the refrigerant lines for cracks or corrosion.
3. Check the evaporator and condenser coil for frost buildup. Frost buildup is a sign of low refrigerant levels.
4. Use a leak detector or soapy water solution to test for leaks around the refrigerant lines and fittings.
If you suspect a refrigerant leak, call a professional HVAC technician to repair and recharge your AC system. Ignoring a refrigerant leak can lead to more serious problems that can damage your AC unit beyond repair.